Promotions
Promotions are the core of Adsgun. They control how, when, and where you present discounts to customers, combining discounts, visibility rules, scheduling, and storefront blocks into a single campaign.
1 What are promotions?
A promotion in Adsgun is a campaign that brings together one or more discounts and controls exactly how they are shown and applied in your store. Think of a promotion as a wrapper around your discounts that defines all the rules: who sees it, when, on which pages, and in what priority order.
Each promotion can include up to 5 native Shopify discount codes, attach storefront blocks (like notification popups or product page banners), set visibility to public, private, or account-specific customers, and be scheduled to run during specific time windows.
2 Navigating to promotions
To access Promotions in Adsgun:
-
Open your Shopify Admin and go to Apps in the left sidebar.
-
Click on Adsgun to open the app.
-
In the Adsgun navigation, click Promotions. This is where you can list and manage all promotions.
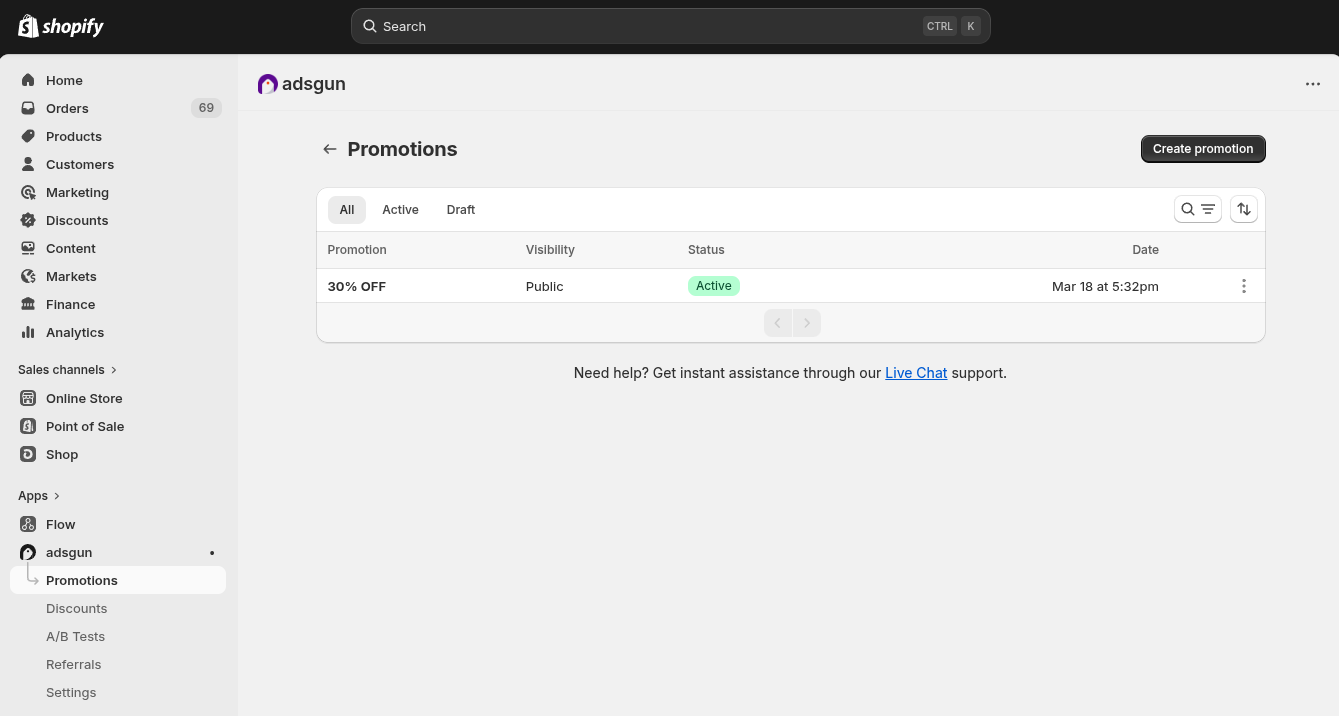
3 Creating a promotion
To create a new promotion, click the Create promotion button in the top right of the Promotions page. This opens the promotion editor where you configure all aspects of the campaign.
Title
Give your promotion a descriptive name. You can also check Auto-generate title from codes and Adsgun will automatically create the title based on the discount codes you attach. The title is for your internal reference only and is not shown to customers. It is limited to 64 characters.
4 Visibility
Visibility controls who can see and benefit from your promotion. There are three options:
-
Private
Only customers who visit via a specific Adsgun private link will see and receive this promotion. Great for exclusive offers, influencer codes, or VIP deals shared through a direct URL.
-
Public
Adsgun automatically applies the promotion for everyone who visits the matching URLs. No code entry needed from the customer. Best for sitewide sales and general promotions.
-
Customer Account
Only logged-in customers with a specific customer tag will receive this promotion. Useful for loyalty rewards, member-only pricing, or B2B customer segments.
5 Priority & URL targeting
Priority
Priority determines which promotion takes precedence when multiple promotions are active and overlap on the same page or for the same customer. A higher number means higher priority.
How priority works
- If two promotions target the same URL and both are public, Adsgun applies the one with the higher priority.
- If priorities are equal, Adsgun will apply both if the discount limit allows it.
- Use priority to ensure your most important campaigns are never overridden by older or lower-importance ones.
URL targeting
URL targeting controls which pages of your store the promotion is active on. You have two options:
- Apply to all pages – the promotion is active across your entire store.
- Apply to specific URLs – the promotion only activates when the customer’s URL contains the paths you define. For example, entering /collections/sale would limit the promotion to your sale collection page only.
6 Offer & discounts
The Offer section is where you attach the discount codes that this promotion will apply. Click Select discounts to search for and add your Shopify discount codes.
Which discounts can I add?
You can add any discount code type from your Shopify Admin: percentage, fixed amount, free shipping, or Buy X Get Y. Automatic discounts cannot be selected here because they do not have a code. If you have automatic discounts you want to use, see the Discounts guide for how to convert them to discount code and still get them auto-applied with Adsgun promotions.
7 Markets
The Markets section lets you control which Shopify Markets this promotion is available in.
- Available on all markets – the promotion is active in every market you have configured in Shopify. This is the default option.
- Limit promotion to certain markets – select one or more specific markets. Only customers browsing from those markets will see and receive the promotion. Useful when running region-specific sales or currency-specific pricing promotions.
8 Scheduling
The Schedule section lets you control exactly when your promotion is live. You can either keep it always active or schedule it for a specific time window.
Always active
The promotion runs indefinitely until you manually pause or delete it. Best for evergreen promotions like a permanent welcome discount.
Scheduled
Set a specific start date and time. Times are in EST (Eastern Standard Time). Additional options become available:
- Set end date – the promotion will automatically deactivate at the specified end date and time.
- Repeat – run this promotion on a recurring schedule (e.g., every weekend or every first day of the month).
- Active hours – optionally restrict the promotion to certain hours of the day, even within the scheduled date range. Useful for flash sales or happy hour promotions.
9 A/B Testing
Adsgun has built-in support for A/B testing promotions. This allows you to test different discount offers, visibility rules, or storefront block designs against each other to find what performs best.
How to flag a promotion for A/B testing
Check the Flag this promotion for A/B Testing checkbox in the A/B Testing section. When enabled, two things happen:
- The promotion will only be available inside A/B test configurations and will not run on its own as a standalone promotion.
- The promotion’s status will be locked to Draft, meaning it will not go live until it is included in an active A/B test.
10 Storefront blocks
Storefront blocks are the visual elements Adsgun adds to your theme to communicate your promotions to customers. Each promotion can have its own set of blocks placed on different pages of your store.
Theme selection
Adsgun detects your currently active Shopify theme and confirms whether the Adsgun extension is enabled for it. You will see a green confirmation message when everything is connected. Use the Change button if you want to connect a different theme, for example a development theme you are testing.
Block placement by page
You can add blocks to different sections of your store independently. Available placement areas are:
-
Global (Notification popup)
Appears across all pages. The default block here is the notification popup, which shows a banner or modal to customers when they land on your store.
-
Home
Blocks displayed on your homepage only.
-
Collection
Blocks shown on collection/category pages.
-
Product
Blocks shown on individual product pages, such as a countdown timer or discount badge near the Add to Cart button.
-
Cart
Blocks displayed in the cart, useful for showing the applied discount or encouraging a higher spend to unlock a better deal.
-
Customer Account
Blocks shown to logged-in customers on their account page.
To add a block to any section, click Add block next to that section and choose from the available block types. Each block can be individually edited using the pencil icon, or removed using the three-dot menu.
11 Google Merchant Center
Adsgun includes an integration with Google Merchant Center that allows you to sync your promotions directly to Google Shopping, so your discounts appear on product listings in Google search results.
What gets synced
Only promotions with simple percentage or fixed amount discounts can be synced to Google Merchant Center. More complex discount combinations (free shipping only, Buy X Get Y, stacked discounts) are not supported by Google’s promotion feed format.
How to connect
-
Click “Manage connection”
In the Google Merchant Center section of your promotion editor, click the Manage connection button. -
Add your Google account email
Because the Adsgun Google app is currently in development mode, you need to contact Adsgun support first to have your Google account email added to the approved testers list. Use the Click here to contact support link in the section. -
Connect your account
Once your email has been approved, return to the connection screen and complete the OAuth flow to link your Google Merchant Center account. -
Sync the promotion
With the account connected, your eligible promotions will be synced to Google Merchant Center automatically when they are active.
The Google Merchant Center integration is currently in development mode, which means you need to request access before connecting. This will be removed once the integration reaches general availability.