How to Add Sale Badges to Shopify Products (No Code Required)
Sale badges are one of the quickest ways to drive clicks from collections to product pages. Learn how to add a Shopify sale badge automatically, without touching a line of code.
You’re browsing a Shopify store’s collection page. You see 12 product cards. Three of them have a red “SALE” badge. Where does your eye go first?
To the badges, of course.
Adding a Shopify sale badge is one of the most effective moves you can make on a collection page. Badges draw attention, signal value, and drive clicks. Studies on ecommerce UX show that products with visible discount labels see meaningfully higher click-through rates than unmarked items, even when the underlying discount is identical.
Yet many Shopify stores do not use badges at all, or they rely only on the compare-at-price feature. That approach only shows a badge if you manually set each product’s compare-at price, a time-consuming process that breaks the moment you run discount codes or automatic discounts.
The better approach: use Adsgun to automatically generate dynamic sale badges that pull from your active promotions. When a promotion is running, badges appear automatically across collections and product pages. When the promotion ends, badges disappear. No manual work. No code.
Why a Shopify Sale Badge Drives Clicks and Conversions
Sale badges work on multiple psychological levels.
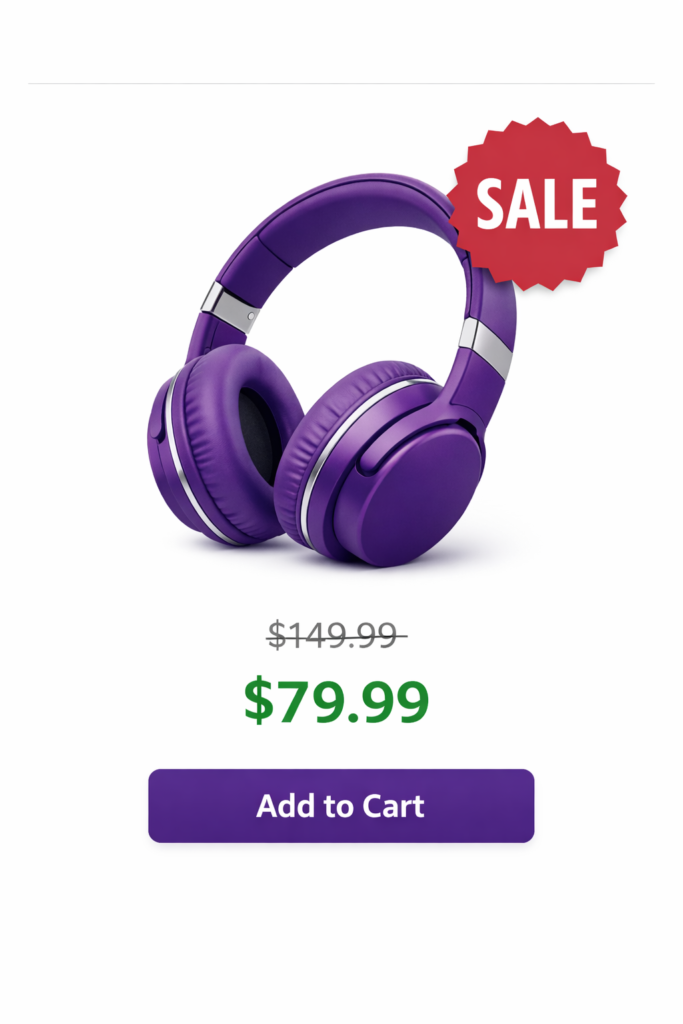
Attention: Humans notice bright colors and visual contrast. A red badge stands out against a white product card immediately.
Urgency: A badge signals that something is limited or time-bound. “SALE” implies the deal will not last forever, creating a nudge to click and explore.
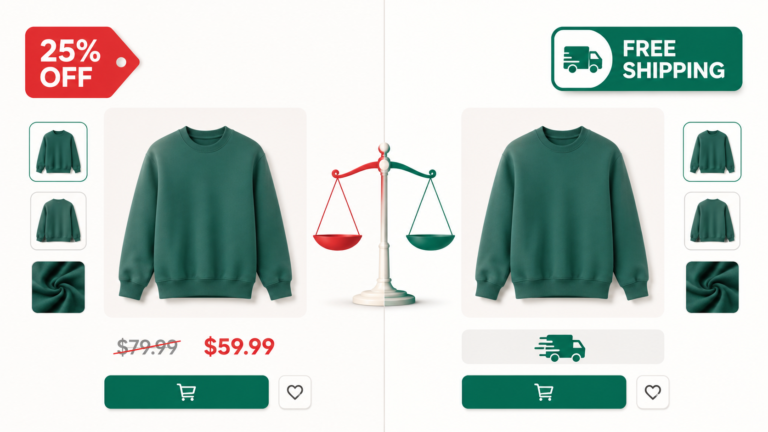
Value perception: A “25% OFF” badge tells the customer exactly how much they are saving without requiring them to do any math.
Reduced friction: Instead of a customer wondering whether something is discounted, the badge answers the question before they even click. According to Fordeer Commerce research, visual sale badges can increase product click-through rates by up to 15%.
What Shopify Offers Natively (And Where It Falls Short)
Shopify has two native ways to show sale indicators.
1. Compare-At Price
If you set a compare-at price on a product, Shopify’s theme can optionally display an “On Sale” badge and show the original price struck through.
The problem is that compare-at prices are static. They are set manually per product. This works for permanent discounts or seasonal pricing, but it breaks down for discount codes (Shopify does not link codes to compare-at prices), automatic discounts, dynamic percentage discounts you cannot auto-calculate per product, and promotions that change regularly. For a deeper look at how compare-at price works and where it falls short, see our complete Shopify compare-at price guide.
2. Theme-Based Badges
Some Shopify themes include built-in badge support. You can add custom text such as “Hot Deal”, “New”, or “Sale” through theme settings. But these badges are static and do not change based on your active promotions.
For most merchants, neither option provides what they actually need: dynamic, automatic, promotion-driven sale badges.
How to Add a Shopify Sale Badge with Adsgun (No Code)
Adsgun’s badge system watches your active promotions and automatically generates badges based on real discount data.

Badge Types
When you set up a promotion in Adsgun, you choose the badge format. Options include percentage (“25% OFF”), dollar amount (“SAVE $30”), fixed text (“SALE”, “LIMITED TIME”, “FLASH SALE”, “MEMBER PRICE”), or fully custom text such as “Member Exclusive” or “Insider Deal”.
Dynamic Calculation
If you choose “25% OFF”, Adsgun calculates the percentage from your actual discount. If you change the discount amount, the badge updates automatically. This is fundamentally different from compare-at prices, where you manually set the original price per product. Adsgun reads your promotion settings and generates the badge for you.
Badge Placement
You choose where the badge appears on product cards: top-left corner (traditional placement), top-right corner, bottom-right corner, or a full-width banner across the top. A custom position is also available.
Badge Appearance
Everything is customizable. You control background color (your brand color, red, green, or any custom hex), text color, border style (rounded corners, sharp edges, outlined), font size, and shape (rectangle, circle, ribbon, or banner).
Where Badges Appear
Adsgun shows badges on collection pages (product grid cards, helping customers spot deals at a glance), product pages (at the top of the product hero, reinforcing the discount), and Shopify search results. Badges can optionally appear on homepage featured products, lookbooks, and anywhere else product images are displayed.
Step-by-Step: Creating a Shopify Sale Badge
- Open Adsgun in your Shopify admin.
- Create or select a promotion, for example “Summer Sale 25% Off Activewear”.
- Go to Display Settings by clicking “Appearance” or “Display” within the promotion.
- Enable Badges by checking “Show sale badge on products”.
- Choose badge type: percentage off, dollar amount, fixed text, or custom. For example, selecting “Percentage off” will automatically display “25% OFF”.
- Customize appearance: pick your background color, set text color to white for contrast, choose a shape such as rounded rectangle, and set font size to medium for mobile readability.
- Set the position: top-left corner is the most visible placement.
- Preview: Adsgun shows you what the badge looks like on a sample product card across desktop and mobile.
- Adjust if needed: if the badge covers important product image content, shift the position.
- Publish: the badge now appears on all eligible products in your promotion.
Visit a collection page after publishing and you will see the badge live on every product that is part of the promotion. If badges are not appearing as expected, check our guide to fixing Shopify sale badges not showing on collection pages.
Badge Design Best Practices
Color Choice
Red is the traditional choice for urgency and clearance sales, offering the highest contrast against white backgrounds. Green works well for positive associations around savings and special offers. Your brand color is ideal for branded promotions such as VIP pricing or member exclusives.
Text Clarity
Keep badge text short: “SALE”, “25% OFF”, and “Save $30” are all proven formats. Longer text can work if your badge is large enough, but always test on a real mobile device to confirm readability.
Avoid Over-Badging
If every product has a badge, the visual power disappears. Reserve badges for flash sales, significant discounts (15% or more), and special customer segments. Badges work best when they are selective.
Position Matters
Top-left corner is the most visible placement because that is where eyes naturally start reading. Top-right is a strong secondary choice. Bottom-right is less visible and should only be used if the product image is visually cluttered. A full-width banner delivers the highest visibility for major sitewide promotions.
Mobile Responsiveness
Adsgun’s badges are automatically responsive. On mobile they may render slightly smaller to fit screen constraints. Always preview on an actual mobile device before publishing.
Real-World Example: Collection Page Optimization
Before badges: a collection page shows 12 product cards that all look identical. Customers see prices ($89, $98, $120) but have no idea which items are discounted. Click-through rate to individual product pages sits at around 2%.
After badges: the same collection, the same products, the same prices. Three items now carry prominent “25% OFF” badges. Customers’ eyes go directly to the badges. Click-through rate to badged product pages climbs to 3.5 to 4%, while non-badged products remain unchanged at 2%.
The result is a net 40 to 50% increase in clicks on discounted products, which flows through to more orders.
Combining Badges With Other Display Elements
For maximum impact, combine sale badges with other Adsgun display features. The table below shows how each element fits into the customer journey.
| Element | Purpose | Best Used For |
|---|---|---|
| Badge | Draw attention on collection pages | All promotions |
| Strike-through pricing | Show Was/Now on product pages | Product page hero |
| Cart display | Reinforce savings during checkout | Reducing cart abandonment |
| Announcement bar | Broadcast the promotion sitewide | Sitewide sales |
A customer sees the badge on a collection card (draws the click), lands on the product page (sees strike-through pricing), adds to cart (sees per-item savings in the cart display), and completes checkout seeing total savings confirmed. Each element reinforces the value at every step.
FAQ: Shopify Sale Badges
Will badges slow down my store?
No. Adsgun’s badges are lightweight and delivered via CSS. They do not impact page load time.
Can I hide badges for certain products?
Yes. When setting up a promotion, you choose which products are eligible. Only those products receive a badge.
Can I use different badge styles for different promotions?
Yes. Promotion A might use “25% OFF” in red while Promotion B uses “FLASH SALE” in orange. Each promotion controls its own badge appearance independently.
What if my theme already has badges?
Adsgun’s badges coexist with theme-level badges. If you prefer to show only Adsgun badges, you can disable the theme badges through your theme settings.
Ready to Add Dynamic Sale Badges?
Sale badges are one of the easiest ways to increase collection page click-through and draw attention to your active promotions. They are visual, automatic, and effective.
With Adsgun, no coding is required. Create a promotion, choose a badge style, and badges appear across your store automatically.
Start your free trial and add your first Shopify sale badge today. No credit card required.