Meta Ads Shopify Discount Setup: Show Ad Traffic the Deal You Were Promised`
Your Meta ad promises 20 percent off, the visitor lands on full prices, and the sale you paid for bounces. Here is how to set up a Meta ads Shopify discount that auto-applies and shows strike-through pricing the moment ad traffic arrives, plus how to track which campaign actually converted.
You paid for the click. The ad on Facebook or Instagram promised 20 percent off, the shopper tapped through, and then your Shopify store greeted them with full prices everywhere they looked. That gap between the promise and the landing page is where most paid budgets quietly leak, and closing it is what a proper Meta ads Shopify discount setup is really about. This guide walks through why the mismatch happens, how URL parameter promotions fix it, how to wire the whole thing up with Adsgun, how to run different deals per campaign, and how to know which campaign actually earned the sale.
The Mismatch That Burns Your Meta Ad Budget
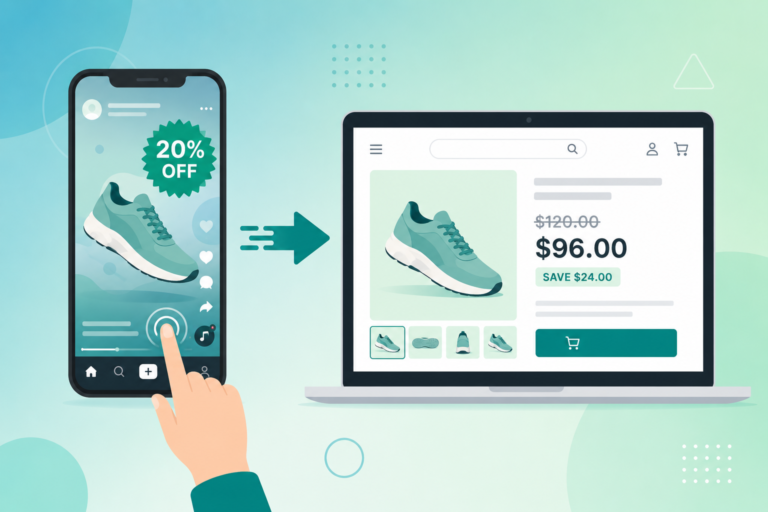
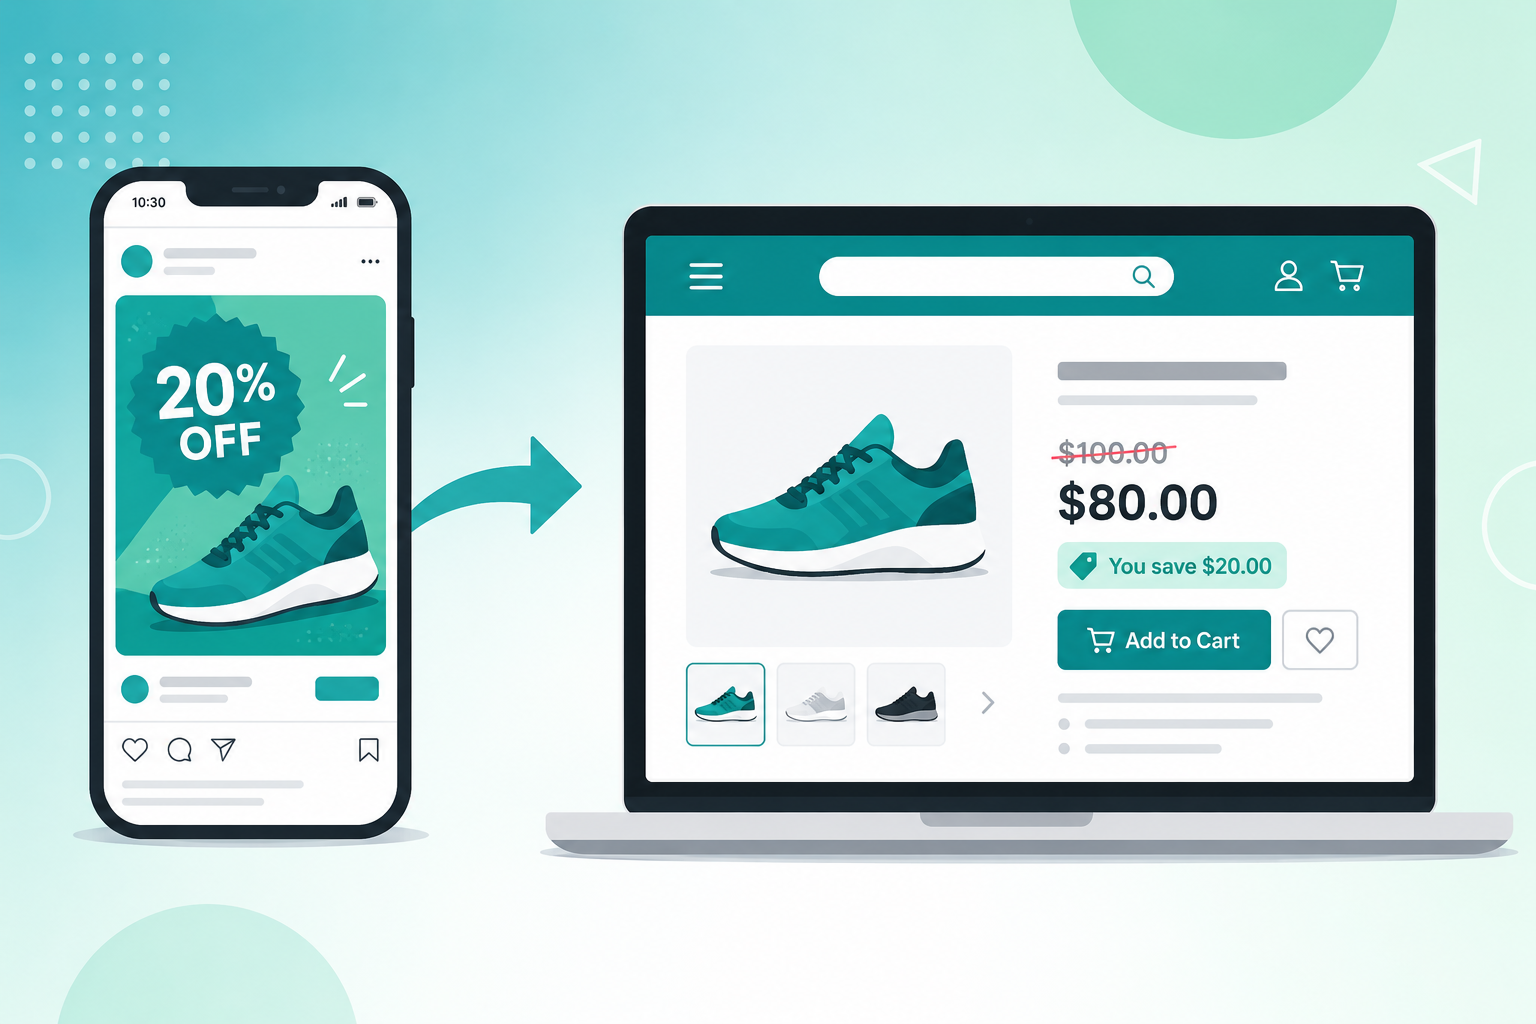
A Meta ads Shopify discount only works if the discount is visible the instant the visitor arrives. Here is the problem in practice. Your ad creative says “Summer Sale, 20 percent off everything.” The shopper clicks with that number in their head. They land on a product page and see the regular price with no badge, no strike-through, and no sign the sale they were promised even exists.
Shopify makes this worse than most merchants realize. Standard discount codes and automatic discounts only apply at the cart or checkout, so the entire browsing experience happens at full price. The shopper has no way to confirm the deal is real until they have already added to cart and reached the final screen, and most of them never get that far. Cart abandonment across ecommerce sits around 70 percent, and a meaningful slice of that is plain disappointment: the price on the page did not match the price in the ad. If you want the full breakdown of why these discounts stay hidden, see our guide on why a Shopify discount code does not show on the product page.
Paid traffic is the most expensive traffic you have. An organic visitor who bounces costs you nothing. A Meta click can cost a dollar or several, so every visitor who leaves because the promised discount is invisible is money you already spent and will not get back. The creative did its job and earned the click. The landing experience undid it.
How a Meta Ads Shopify Discount Should Actually Work
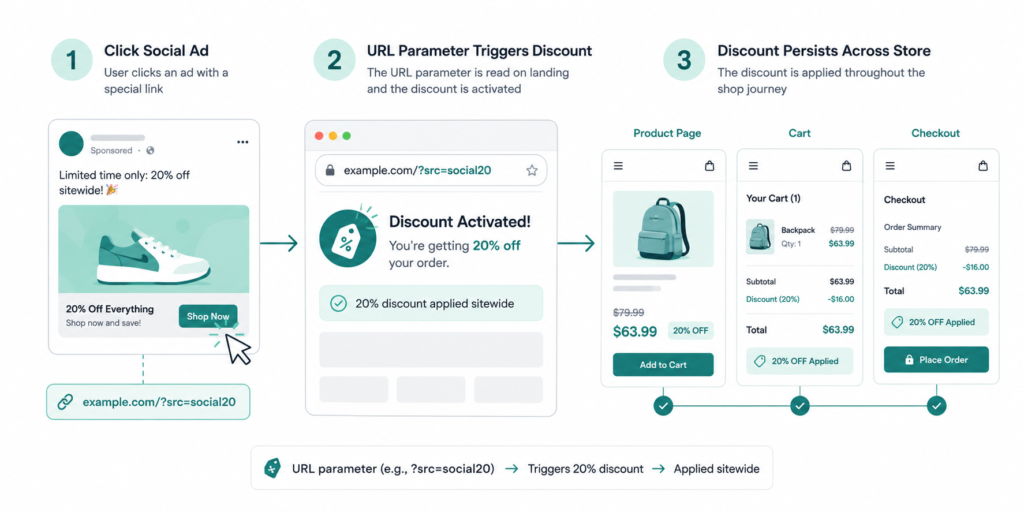
The fix is to make the discount appear automatically the moment a visitor lands from your ad, on every page, not only at checkout. This is exactly what URL parameter promotions do.
The idea is simple. You add a small tag to the destination URL in your ad, something like ?promo=meta-summer20. When a visitor clicks the ad, they arrive at your store with that tag in the address. Adsgun reads the parameter, recognizes the campaign, and switches on the matching promotion for that session. The same product that shows 50 dollars to a regular visitor now shows the original price struck through next to the sale price, with a savings badge, on the product page, the collection page, the cart, and the checkout.
Crucially, this is not a fake compare-at price trick. Adsgun ties the visible price to a real Shopify discount, and that discount auto-applies at checkout with no code for the customer to remember or type. The shopper sees the exact deal the ad promised, from the first second to the final payment screen. If you want the mechanics in depth, the Shopify discount URL parameter guide breaks down how detection and triggering work, and the auto-apply discount codes guide covers the checkout side.
This is one of four promotion types Adsgun supports. Public promotions show the same deal to everyone, private promotions unlock through a unique link, Customer Account promotions trigger on Shopify customer tags, and URL-targeted promotions, the ones that matter here, trigger on a campaign parameter. They can all run at the same time, which is what makes per-campaign pricing possible.
Setting Up Your Meta Ads Shopify Discount with Adsgun
Here is the full setup, in the order you should build it.
Step 1: Create the discount and the promotion. In Shopify, create the discount you want to advertise, for example a 20 percent off automatic discount or a code like SUMMER20. Then open Adsgun, create a new promotion, choose the URL-targeted type, and set the trigger to a parameter value such as promo=meta-summer20. Attach your Shopify discount to that promotion. The promotion is now armed and waiting for traffic that carries that tag.
Step 2: Build the campaign URL. This is where most setups go wrong, so it is worth getting right.
UTM Parameters and Your Meta Ads Shopify Discount Trigger
Two kinds of parameters live on the same URL and do two different jobs. The trigger parameter (promo=meta-summer20) tells Adsgun which promotion to show. The UTM parameters (utm_source, utm_medium, utm_campaign, utm_content) tell your analytics where the visitor came from. You want both.
In Meta Ads Manager, UTMs belong in the URL Parameters field at the ad level, inside the Tracking section, not pasted onto the Website URL. Meta even gives you a “Build a URL Parameter” tool there. A clean setup looks like this:
- Website URL: https://yourstore.com/collections/sale?promo=meta-summer20
- URL Parameters field: utm_source={{site_source_name}}&utm_medium=paid_social&utm_campaign={{campaign.name}}&utm_content={{ad.name}}
The double-brace items are Meta dynamic macros. {{campaign.name}} and {{ad.name}} fill themselves in automatically from your campaign and ad names, and {{site_source_name}} resolves to the platform the click came from, so you can separate Facebook traffic from Instagram traffic without building two different links. Meta documents the full set on its official help page for adding URL parameters to your ads. Keep every value lowercase with hyphens or underscores, never spaces, so your reports do not fragment “Facebook” and “facebook” into two separate sources.
The result is a single link that activates the right discount through the trigger parameter and tracks the right campaign through the UTMs.
Step 3: Align the creative with the landing page. The number in the ad and the discount tied to the parameter must match exactly. If the ad says 20 percent and the parameter triggers a 15 percent promotion, you have rebuilt the same trust gap you set out to fix. Match the headline, the percentage, and the products. If the ad shows a specific sneaker at 20 percent off, the parameter should land the shopper on that sneaker with 20 percent already showing.
Campaign-Specific Pricing: Different Audiences, Different Deals
Because URL-targeted promotions run in parallel, each campaign can carry its own offer. Cold prospecting audiences usually need a stronger hook than warm visitors who already know you, and retargeting traffic sits somewhere in between.
A common structure looks like this:
- Prospecting campaign: ?promo=meta-cold20 triggers 20 percent off
- Engagement or warm campaign: ?promo=meta-warm15 triggers 15 percent off
- Retargeting campaign: ?promo=meta-cart10 triggers 10 percent off
Each shopper sees the exact deal meant for their segment, applied automatically, with no codes to juggle. The offer also feels more tailored, because it arrives through the specific link that audience clicked, which tends to convert better than a single generic sitewide banner. For the deeper retargeting version of this, with discount depth tuned to product viewers, cart abandoners, and checkout abandoners, see the Shopify retargeting discount ads guide.
Attribution: Which Campaign Actually Drove the Order
Knowing a campaign got clicks is easy. Knowing it earned revenue is the part that has gotten harder, and 2026 made it harder still.
Meta’s reporting now defaults to a 7-day click, 1-day view attribution window. The longer 7-day and 28-day view windows were removed in January 2026, and recent iOS privacy changes strip tracking parameters from many links in private browsing, which means Meta’s own dashboard increasingly undercounts or misattributes iOS conversions. You can read more in this rundown of Meta’s 2026 attribution changes. If you lean only on Ads Manager numbers, you are reading a blurry picture for a large share of your traffic.
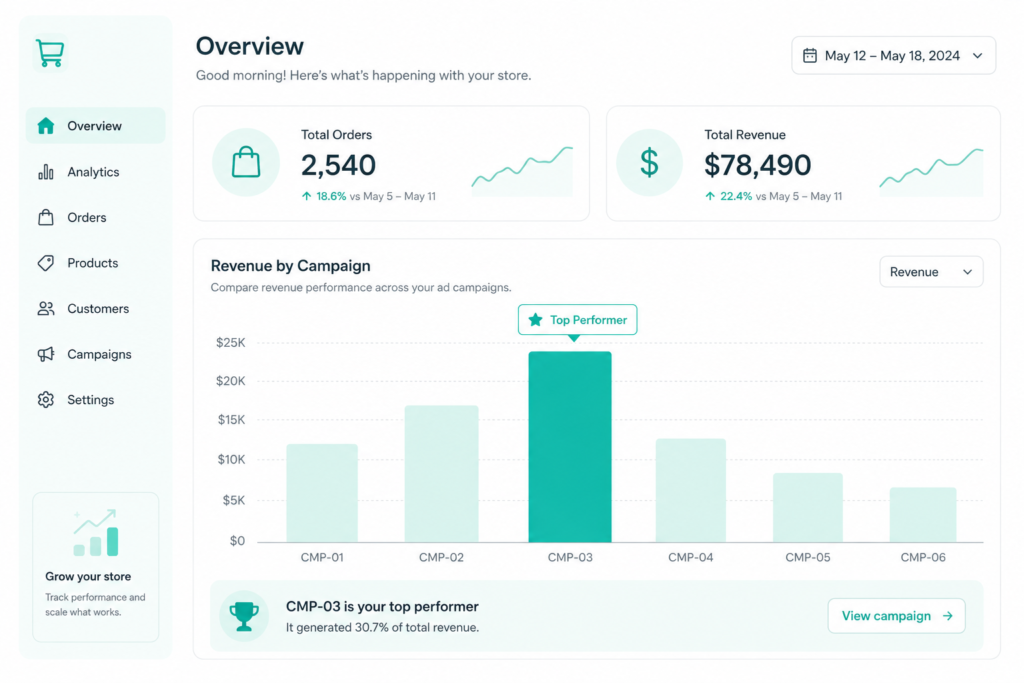
This is where a Meta ads Shopify discount setup built on URL parameters earns its keep twice. Because Adsgun records which promotion applied to each order inside Shopify, you get first-party, order-level attribution that does not depend on Meta’s pixel surviving for seven days. The promotion analytics show you, per campaign parameter, how many orders and how much revenue each one produced. Layer your UTMs on top, flowing into Google Analytics 4, and you can cross-check Meta’s claimed conversions against what your store actually recorded. Three views of the same campaign, triangulated, beat any single dashboard.
A Full Example Campaign, Start to Finish
Say you are launching a summer sale, 20 percent off, promoted to a cold prospecting audience on Facebook and Instagram.
- In Shopify, create a 20 percent automatic discount named Summer Sale.
- In Adsgun, create a URL-targeted promotion, trigger promo=meta-summer20, attached to that discount, applied to your sale collection.
- Set the ad destination URL to https://yourstore.com/collections/summer?promo=meta-summer20.
- In the ad’s URL Parameters field, add utm_source={{site_source_name}}&utm_medium=paid_social&utm_campaign=summer-sale-2026&utm_content={{ad.name}}.
- Build creative that says “Summer Sale, 20 percent off” and shows products from that collection.
- Launch.
Now a shopper taps the Instagram ad, lands on the summer collection, and immediately sees every product with its original price struck through, the 20 percent sale price beside it, and a savings badge. They add to cart, the discount is already applied, and they check out without hunting for a code. In Adsgun, the Summer Sale promotion shows exactly how many orders carried the meta-summer20 tag, and GA4 shows the matching summer-sale-2026 campaign traffic. You can see what you spent and what came back, on the same offer, in one clean loop.
Pitfalls to Avoid
A few things quietly break Meta-to-Shopify discount setups. Watch for them.
Cached pages. If your store sits behind aggressive full-page caching, or a redirect strips query parameters, the trigger tag can get lost before Adsgun reads it. Test your live ad link in a private window before you spend a cent, and confirm the strike-through actually appears. If a redirect is dropping parameters, fix it so it preserves the full query string.
Dynamic ad copy mismatch. Meta’s Advantage+ creative and dynamic text features can generate or rotate copy, and an automatically produced line like “Save 25 percent” can contradict the 20 percent your parameter actually triggers. Review the variations Meta creates and remove or lock any that state a specific percentage, so the creative never promises a number your promotion does not deliver.
Advantage+ Shopping campaigns and UTM macros. In some Advantage+ Shopping setups, dynamic UTM macros do not populate reliably. If you run those, lean on a static trigger parameter for the discount itself rather than depending on a macro, so the promotion still fires even when the UTM data is thin.
Parameter casing and consistency. Pick one naming convention and keep it. meta-summer20 and Meta-Summer20 are different strings, and a mismatch between the value in your ad and the value in your Adsgun trigger means the promotion silently does not fire.
FAQ
Do I need a separate discount code for each campaign?
No. You can attach the same Shopify discount to multiple URL-targeted promotions, or create distinct ones per audience. The campaign is identified by the URL parameter, not by forcing the customer to type anything.
Will customers see the discount on Instagram and Facebook differently?
The landing experience is identical. Use the {{site_source_name}} macro in your UTMs if you want to separate the two platforms in reporting, but both audiences hit the same parameterized link and see the same auto-applied deal.
What happens if someone shares the ad link?
Anyone who opens that link gets the promotion, which is usually fine for a public sale. If you need the offer locked to a specific audience, a private or Customer Account promotion is a better fit than a URL-targeted one.
Does this slow my store down?
Adsgun loads asynchronously and does not edit your theme files, so it does not drag your Core Web Vitals or page speed. For the full picture of how it displays pricing across your store, the Adsgun complete guide covers it.
Your Meta ads are already doing the hard part, which is earning the click. Do not lose the sale in the half second after the shopper lands. Show them the exact discount you promised, everywhere they look, and track which campaign brought them in. Try Adsgun free and set up your first URL-targeted promotion this week.